
1. Context
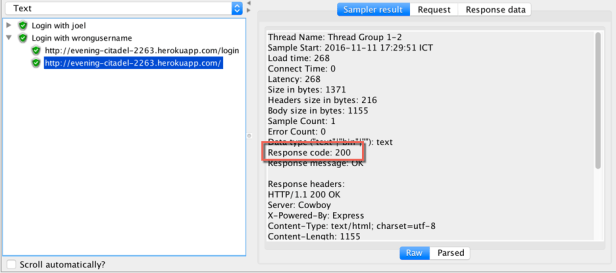
After creating a test plan, you run it and you can see the results look good, all GREEN, but you might not aware of this, it’s NOT so sure that the test is run correctly if we just look at the GREEN result, it might fail inside but you never were known. For example: You config and run the Login request/api, try to input a wrong username or password. You still see the result is in GREEN, check the response data, it shows you the username/password is incorrect, but why is it still GREEN. Because the response code is still 200, and JMeter force 2xx Response Code as a successful sample.
In that case, you need to add a Response Assertion, it helps you to verify the Response Data (or Response Code, Response Message and something else but I just talk about Response Data in this post) to make sure the test is run correctly, if it cannot find your expected text/patterns in the response data, the test will FAIL.
This post I will show you how to detect the problem like above, and how to use Response Assertion.
2. Using Response Assertion
Preparation: I’ll reuse the sample test plan in this post: CSV Data Set Config. But I change a little bit configuration:
– Edit Number of Threads (users) in Thread Group is 2 only.
– Add with ${USERNAME} into Name of HTTP Request, it was just Login in original script.
– Remove two Assertion Response under Login Sampler
– Remove last 7 rows in users.csv file, and add one more row with incorrect data
joel,secr3t
wrongusername,wrongpassword
Or you can just download it here (to understand clearly the script, please read that post carefully)

Issue: Let run the test, and see what will happened
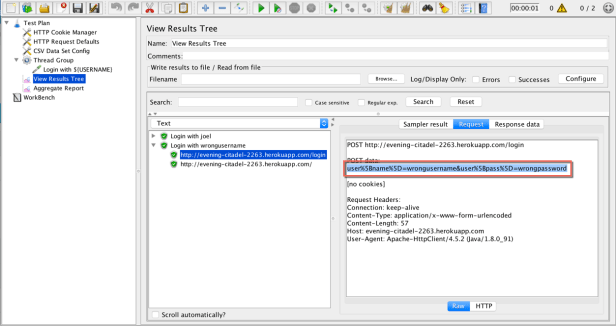
Even the request logged in with incorrect username, and password, but the result is still GREEN, it looks PASS. Because the Response Code is 200, so JMeter count it as a successful sampler.
Let go inside the test a bit, and compare the response data between correct and incorrect user, let see what we have:
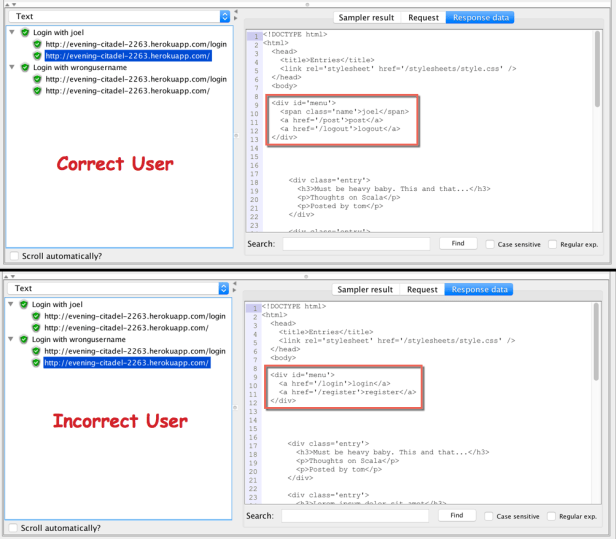
| Correct User | Incorrect User |
|---|---|
| We have username | We DON’T have username |
| We have text post | We DON’T have text post |
| We have logout text | We DON’T have logout text |
| We DON’T have register text | We have register text |
Solution: The table above show some differences between correct and incorrect users. Base on that we will select some special text to verify to make sure the user logged in successfully.
Tip to select special text: you should select the text which is unique, or hard to see anywhere else. For example, I’ll verify text logout which is never appear if users do not login successful.
Configuration in JMeter:
- Step 1: Adding a Response Assertion under Login request
Right-click Login element > Add > Assertion > Response Assertion

- Step 2: Click Add button in the interface of Response Assertion element, then input the text which you want to verify, as said above, I’ll verify text
logoutthen I will inputlogoutinto that field.

- Step 3: Just keep the rest properties as default.
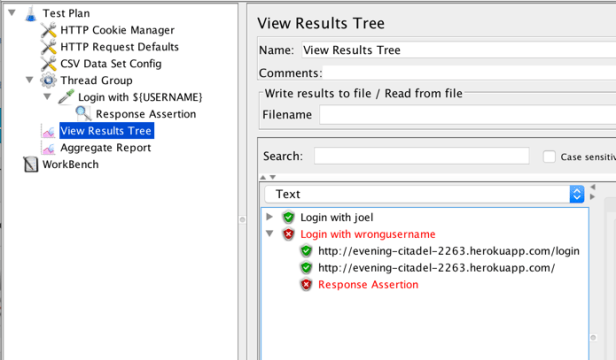
- Step 4: Run and enjoy the result
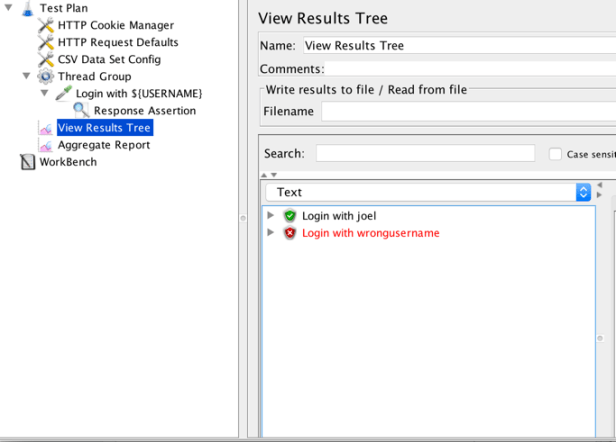
You can see, now the request with incorrect user becomes RED. Go inside this to see what happened.
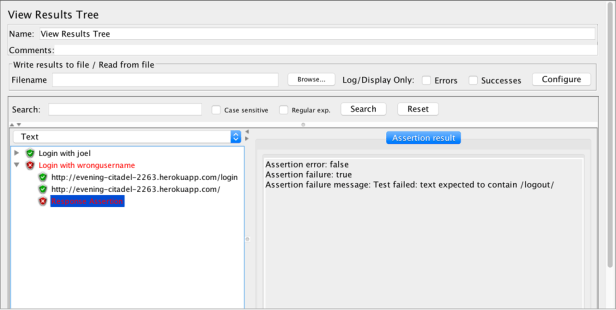
Under the FAIL request, there is a Response Assertion, click on this, it shows you
Assertion failure message: Test failed: text expected to contain /logout/
It means the test fail due to Response Data does not contain the text logout. It match with our expectation as said above.
Note: One more thing, if the text logout is not enough to convince you that the test run correctly, then you can add one more assertion (but I’m STRONGLY NOT RECOMMENDED this way, only 1 assertion is enough).
So, I will show you how to add more assertion. For example, refer the “difference” table above, I will verify the username of logged in user. You can see the displayed name is the same with logged in username, I’ll use this to verify.
- Step 1: In the Response Assertion, click Add again
- Step2: Input ${USERNAME} –> it represent the logged in username, which get from csv file
- Step 3: Run and enjoy
3. Conclude
To make sure the test runs correctly, sometimes we just add the Assertion to verify the response. And to use the Assertion Response in an easy way, just remember and following these steps below:
- Step 1: Add Response Assertion under sampler which you want to verify
- Step 2: Click Add in Response Assertion element, and input the text you want to verify. Please make sure the text should be unique.
- Step 3: Click Add to add more text to verify
- Step 4: Leave all others properties as default.
Related to Properties of Response Assertion, please check out the link to see the detail.
